No products in the cart.
Hair Care Guide
4 Effective ways how to remove tape in hair extensions?
Hair extensions provide long and thick hairs immediately, making them ideal for special occasions such as parties, weddings, and proms. And it can be a good choice for your hairstyle everyday regardless of being pricey. Nevertheless, there will come a time when you will need to remove your tape in hair extensions to change your hairstyle.
Thus, to solve this problem, we will walk you through a few methods of the removal of tape-in hair extensions at home. Before you remove your hair, make sure it is clean and fresh. Follow the simple instructions and a step-by-step tutorial to remove tape in hair extensions.
Related posts:
- How to wash tape in hair extensions: A step-by-step guide
- How to put in tape in hair extensions in 2 minutes?
- How to tie your hair up with tape extensions?
Can you remove tape in hair extensions yourself?
The answer is definitely yes, you can remove your tape-in hair extensions yourself. It is possible to accomplish it at home yourself or with the assistance of your friends as long as you follow all required steps and be sure not to pull too hard when removing. The single most important thing about getting hair extensions is ensuring that there is no hair loss.

How long does it take to remove tape-in hair extensions?
It will generally take roughly from 20 minutes to 45 minutes to remove all of the tape hair extensions, depending on your hair and how many hair extensions you are wearing. The right tape in hair extensions will not require harsh chemicals to remove them properly, quickly, and without damage. If you’re having extensions taken out and refitted, expect a longer wait of one hour.
How to remove tape-in hair extensions at home?
There will come a time when you will need to remove your tape-in hair extensions. Although there are several ways to remove them, we’ve developed a brief list of straightforward methods.
1. Use adhesive remover to remove tape-in hair extensions

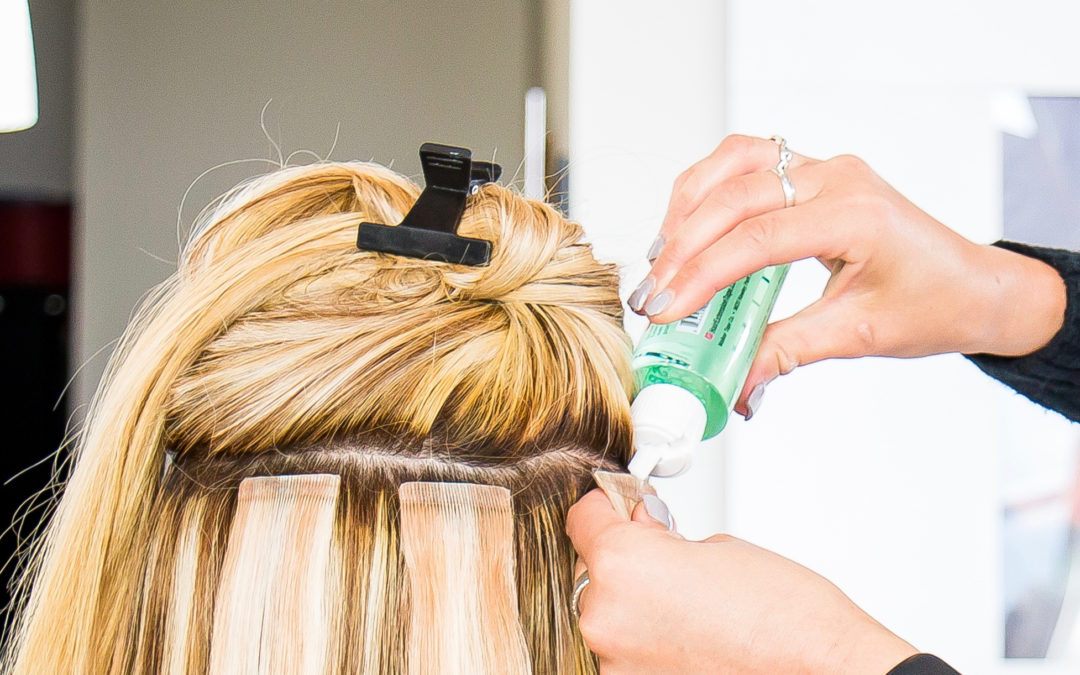
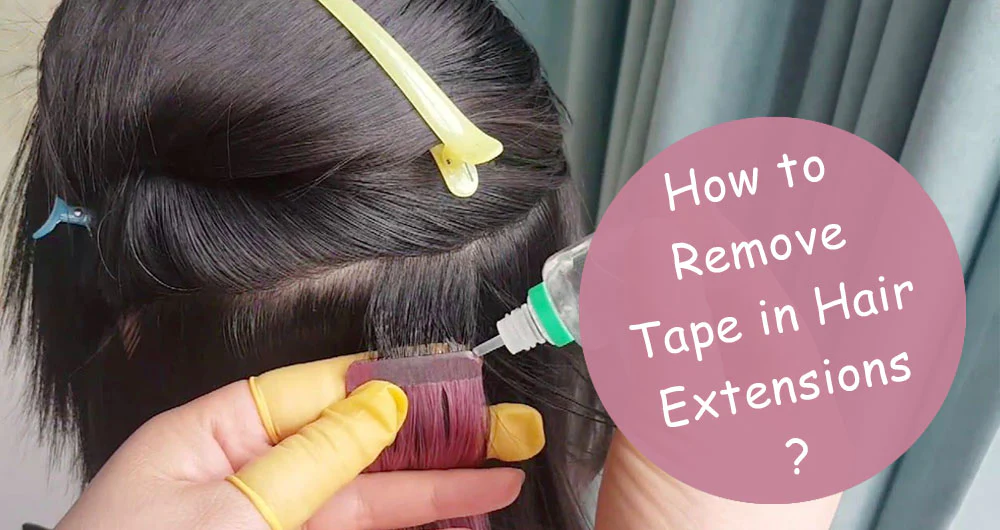
Step 1: Apply tape remover on tape-in hair extension
Separating your hair into workable sections by using a clip or tie. Saturate the tape-in with the product until you feel the area is soaked.
Step 2: Wiggle the tape-in
Pull gently on the section of the hair extension nearest to the tape. Wiggle it softly, but don’t pull too hard or you’ll damage your hair and the extension.
Step 3: Apply more remover and hold it in place
Spray the product generously over the tape and allow it to sit for a few minutes if the hair extension is still stuck.
Step 4: Peel the tape away gently when it can be easily peeled off
Peel the tape away from your natural hair using your fingernails. It should easily come away in your hands. The adhesive will adhere to your hair extensions but not to your natural hair.
Step 5: Work your way through all of your hair extensions
Work your way through each row of hair extensions, beginning on the left and ending on the right. Start at the top of your head and work your way down. Apply hair extension remover to each piece of tape and take it away until it seems like it may easily fall out.
Step 6: Wash and apply conditioner
Once you have taken all of your hair extensions out, your hair may feel greasy or sticky owing to the tape residue and the hair extension remover. Wash your hair as usual and use a conditioner to keep it hydrated. Comb the conditioner into your hair to help eliminate the stickiness.
In an emergency, if you need to remove the extensions without using an adhesive remover, use the techniques listed below. Nevertheless, these tips may not bring satisfactory results, like adhesive remover.
Recommendation: How to wash your hair with tape-in extensions?
2. Apply natural oil to remove tape in hair extensions
Oil-based removers for tape-in hair extensions can vary from coconut oil, Olive Oil, palm oil, or any other oil alike. Stay away from chemical-based oils.

Step 1: Apply oil
Take a certain amount of natural oil and apply it to the roots of your hair strands thoroughly. Leave it on for at least 15 minutes.
Step 2: Oil absorption and removal
The roots and tape bonds completely absorb the oil. Leave the oil on your hair for 30 minutes to allow it to penetrate the adhesive.
Step 3: Peel away the tape gently
Start rubbing the oil into the extension tape to take out tape in extensions without damage.
Removing the extensions using oil might take more time compared to adhesive remover.
3. Using peanut butter to remove tape in hair extensions
Like coconut and olive oil, peanut butter is effective in breaking tape bonds and making it detachable.

You can repeat the removal method with natural oil to get all the tape in extensions out.
It usually takes an hour to remove the residues of the tape in extensions completely.
4. Hair wash to get tape-in hair extensions out
Some of you may be unable to remove the extensions even after applying natural oil or peanut butter. Thus, you should adhere to the below steps:
Step 1: Condition your hair
Take a shower and apply some conditioner to the hair thoroughly.
Step 2: Hair incubation
Cover your hair with a towel. Leave it in for 20 minutes. This process will break the chemical bond present in your tape in hair extensions.
Step 3: Peeling the Tape Away
Start peeling off the hair extension; if the extension is not easily peeled off, then apply more oil and wait for the tape to break down.
Step 4: Repeat until done
Repeat the method to get all of the tape in extensions out.
Tips for the removal
- Apply a high-quality oil such as coconut or jojoba to prepare your hair for hair extension removal
- Keep in mind that your hair extensions are tied to your natural hair, so you may risk tugging or injuring it when removing your tape-in extensions.
- Hair extension removal products are available at local beauty supply stores or online. Some, on the other hand, may be too harsh for your hair or scalp.
- When using a commercial hair extension removal primer, test it on the inside of your elbow for any allergic reactions or irritation before applying it on your hair extension.
How to choose the right tape in hair extensions for wholesale?
Unsurprisingly, deciding the right tape in hair extensions wholesale supplier can be extremely difficult and time consuming. If you want to gain success in the hair industry, you need a reliable and trustworthy source. By conducting a series of research, we are here to help you fing the best hair extensions.
1. List wholesale vendors for tape-in hair extensions
This important step will ultimately save you time and money. You can choose whether to search on the Internet or consult your friends to receive assistance.
- On the Internet, you can search for suppliers of particular kinds of hair extensions. Verify whether the supplier has experience working with the hair extension company you are considering. The best wholesalers of tape hair extensions work with numerous reputable hair extension manufacturers.
- Consulting from friends could help you a lot. When she used those kinds of products, she will have a clear insight. She could give you a lot of helpful feedbacks from products to services.
Make a list of potential high-quality human hair extension suppliers and include their contact details so that you can start your research. Keep in mind that human hair extensions are created from actual human hair. You’ll have at least one source to pick from in this manner. You should initially have between three and five companies on your list so that you may compare prices and services.
Jen Hair is proud of sharing the core value with consumers. We have a website that you can read feedback and reviews. We meet your demands about quality and quantity.

2. Consider materials for human wholesale tape in hair extensions
You must be mindful of the tape in hair extensions’ material quality before buying. Depending on the material, hair extensions are available in a wide range of quality and cost.
Three different types of human hair are used in wholesale tape-in hair extensions: virgin human hair, Remy hair, and non-Remy hair. To discover more about how they differ from one another, please read some of our Jen Hair’s website.
Your choice of hair material depends on your financial and time constraints, but if at all possible, go for the highest quality.
If your budget permits, we advise using virgin or remy raw human hair for extensions. The virgin hair extension is the more prevalent of these two varieties. They will attract more upscale clients to your wholesale hair salon or salon.
One thing to bear in mind is that a lot of sellers will choose the less desirable alternative. You hardly detect the change in the photographs. Our recommendation is to be very clear with them about what you want and how much you want to pay. They will be able to choose the coarse hair to use based on your budget in this way.
Make sure you have a visual depiction of your finished product before agreeing to any terms with a potential supplier. In this way, you’ll be able to determine whether the supplier can produce the things you need.
3. Check for gurarantees and return policies
Make sure you have all of your supplier’s answers to these questions, then, before you place an order. Please ensure that both parties will be protected in the case of a handling error or damage. Make careful to read their warranties in detail and inquire about their policies before making any final decisions.
Some questions you can ask:
- How long does it take to process a return?
- Does the product have a guarantee?
- If the tape in hair extensions does not live up to your expectations, will you get a full refund?
- Is the label need to be attached while returning the items?
- How can you get a refund?
- What happens if the hair extension tangles or develops knots over time?
Where to buy tape in hair extensions wholesale
Since its establishment in 2017, Jen Hair Vietnam has been honored to be one of the first well-known hair extensions wholesale suppliers in Vietnam. Jen Hair has expanded from a small hair-buying location to the largest hair provider in Vietnam. It all thanks to Jen Hair’s dedication and devotion.
With the core value – Focus on quality, we pledge to exclusively provide the highest quality, most long-lasting Vietnamese hair extensions to appreciate customers’ sincere attention.
Obviously, big retailers and hair salons from all continents around the world favor our Vietnamese tape-in extensions wholesale suppliers.
If you are afraid of our legal quality, don’t worry because Jen Hair has received ISO approval for using donor’s hair. We guarantee that we will only use a traceable variety of premium hair from reliable sources.

Final thoughts
That wraps this article today about the tape in hair extensions removal process. It is expected that you have selected your favorite methods to take tape-in hair extensions out on your own. We do believe that these four methods above that we have just shown you would be possible to help you do this process smoothly. If you find any mistakes during your process, please contact us and let us know. We are always available for your help.
Follow us on our social media sites or subscribe to our newsletter. If you have any questions or need help selecting your perfect Jen Hair/s extensions, please contact us here.

 Guide Cornrows With Side Part The Best For Beginner
 Ultimate Guide: Headband with Hair Attached (Best Styles for 2025)
 Top 7 Premium Human Hair Clip In Extensions For Black Hair
