No products in the cart.
Hair Care Guide
How to pluck a wig? A step-by-step guide for beginners
In recent years, the use of wigs as a hair accessory has been no stranger to beauty lovers. Pluck a wig is one of the methods to increase the ability to resemble human hair. Therefore, this method is often focused by real hair experts to have a perfect wig. It’s a very important step, but it’s really not that difficult. In this article we will guide you step by step for beginners.
Related post: How to refresh wavy wig? 5 Effective ways to try
Why should you pluck a wig?
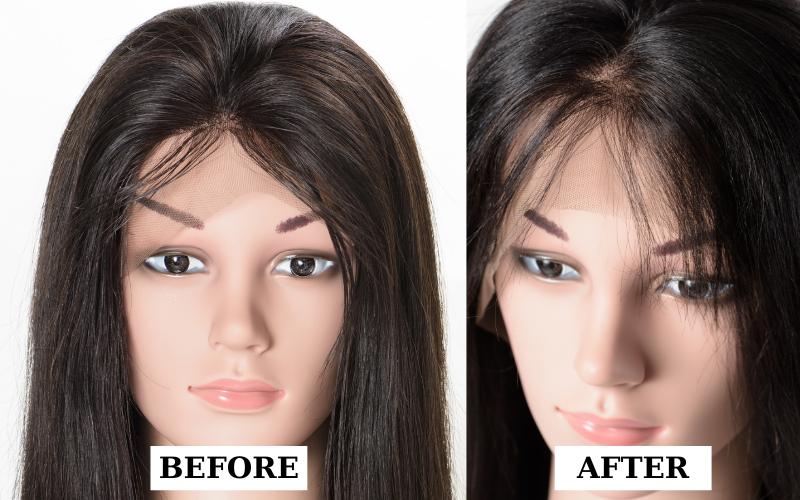
The goal is always for your wig to look sleek and seamless. Pre-plucked wigs help you achieve a hairline with a natural look. In a plucked wig, the density on the top is lower like in real hair. Hair strands of unequal length always tend to grow around a person’s hairline.
So, to get a completely realistic look, the hairpiece or the wig should also be plucked to give that same impression and create a good-looking hairline. Pre-plucked wigs do not have this problem.
In fact, some high-quality wigs have also been partially pulled before the mesh. Only then is it delivered to the customer for use. However, you still have to pluck the wig to match the density of the hair roots of the scalp.

How to pluck a wig?
You can pluck on wet or dry hair. Some people prefer wet hair because it’s easier to move and control, while other people prefer to pluck on dry hair so they can get a true sense of the hair’s density. It’s really up to you.
Here’s what you’ll need :
- A lace-front wig
- A wig stand, pins
- A rattail comb
- A tweezers
When you look at the lace inside your wig, you’ll see a bunch of little black dots. This can look a little unnatural against your scalp, so some people prefer to lighten the knots in order to get a shade that blends in with the color of the scalp. But it’s a bit complicated – over bleaching can damage your wig. Unless you bleach hair on the regular, we recommend skipping it and applying some foundation inside the lace to get a more realistic-looking hair or you can ask a professional hair stylist to do it for you.
Step 1. Put your hair on the wig stand
You’re going to want to secure it with pins. This will make sure that your wig doesn’t slide all over when you’re going at your hairline with tweezers.

Step 2. Check through the front of your hair
Using a rattail comb, smooth back your hairline to make sure there aren’t any knots or tangles. Then with your less-dominant hand, pull the hair back away from the hairline
Step 3: Pluck the wigs
This is the important step where the wig is actually plucked.
With your dominant hand grab the tweezers and pluck hair strands straight back, away from the face. We recommend plucking about every other hair strand to make sure that everything is spaced out (this also helps you avoid bald spots). Start at your hairline, right above your ear, and work your way to the middle.
And please take your time—if you over-pluck, there’s no going back. You also want to make sure that you’re plucking the hair, not the lace. If you go in on the lace with tweezers, you can end up ripping it.
Step 4. Repeat the step above with additional layers of hair
Remember, when you pluck your hair, you’re not just plucking the front of your hairline near your forehead. The goal is to make the entire front of the wig look less dense, so you need to pluck several layers of hair
So, once you’re done with step three, comb out the excess hair you’ve plucked. Then, going from ear to ear, part a thin section of hair and flip it forward (over the head of the wig stand). Pluck that layer to help get rid of the bulkiness. When you’re done with this layer, repeat this step about three to four more times, depending on how deep you want your wig to be plucked.
Brush out everything you’ve plucked out, and now—you’ve got a natural-looking hairline.

Bonus: How to pluck a lace front wig?
How to pluck a lace front wig? This is the most important step of all the wig pulling steps. Honestly I think at this step you should be careful not to damage the wig. So I will talk more about this part:
- Step1: Turn the wig net upside down to put it on a fixed shelf
- Step 2: divide the lace front wig into two hair parts according to the natural hair ratio, maybe the ratio 5/5 or 3/7,…use a strange comb to make the hair in place and clearly see each hair extension zone.
- Step 3: Check if the concatenation has not been bleached. You should use more bleach for it to ensure a more natural hair extension. When bleaching a wig, pay attention to divide the hair into small, flat sections to easily apply the bleach evenly. It is advisable to use a specialized brush so that the bleach applied just enough is not too much and easily spreads to the parts that do not need to be removed.Then wash with specialized wig care water, dry.
- Step 4: Proceed to pluck the wig according to the ratio divided in step 2. stroke the stranger’s hand with the bell-tail comb one more time to determine the thicker part due to the hair. Note plucking in rows on the wig net, alternating plucking so as not to over pluck. If you pluck too much, it will easily cause white dots on the wig net. It will make you look bald.
- Step 5: Put the plucked hair on your head and check the fit. Brush again just to be sure. If not exactly what you want, you can repeat the steps and continue to pull out the hair in the lace front wig.
Expert’s tips on plucking wig
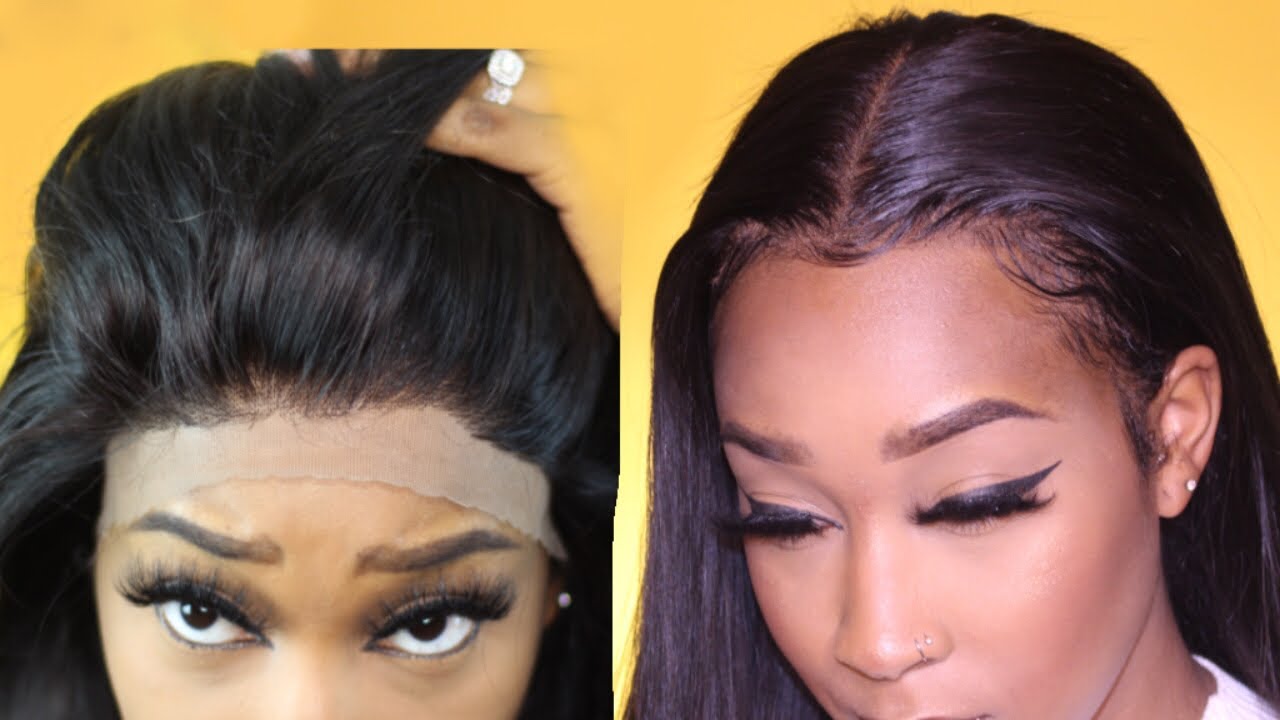
#1: Take a picture of your natural hairline to use as a guide later for your curly wigs.
#2: Create a thin hairline parting according to the photos. Make a small or thin parting to prevent too much hair loss.
#3: Gather the rest of the hair, and pluck the excess hair. Work on achieving a gradual density once you have outlined your hairline.
#4: Divide out some hair, don’t worry about the width because it does not have to be consistent. Now you can start plucking hair.
#5: Continue to section out some more hair by plucking some hair off the less thin sections than the other parts. Gradually the frontals will start to look natural.
#6: The final and most important step is to check whether any wig area looks denser than the other parts. If you notice some dense part, then right away, pluck away the excess hair. Doing the exact steps will ensure an authentic output, and the wig will look natural when you wear it.
#7: Once you have completed all the plucking hair processes, you can happily wear or install wigs without any hassles. Grab the wig, and put your head inside the wigs. Tug it well on the sides and adjust the straps and clips for a proper fit. Style it any way you want and rock the wigs like never before.

Final thoughts
For the beginner this process will take a lot of patience to really nail down this technique, but remember: slow and steady wins the race, it’s worth the time to customize your wig for a perfect fit. After time, when you In no time, you will be plucking your wigs like a piece of cake and pull-off different looks that will help you radiate that confidence.

 Guide Cornrows With Side Part The Best For Beginner
 Ultimate Guide: Headband with Hair Attached (Best Styles for 2025)
 Top 7 Premium Human Hair Clip In Extensions For Black Hair
