No products in the cart.
Hair Care Guide
How to Achieve Half Sew In with Braids in Front
For a trendy and versatile look, look no further than the half sew in with braids in front! This unique style combines the benefits of a sew-in technique with the added texture and dimension of braids in the front section.
In this blog post, Jen Hair will guide you through the process of achieving this stunning hairstyle by understanding the half sew-in technique and exploring different types of braids for the front section. Get ready to turn your head!

Understanding the Half Sew-In Technique
The sew-in technique is a popular method for a long-lasting and natural-looking hairstyle. It involves attaching hair extensions to natural hair using a needle and thread. With a half sew-in, a portion of the hair is braided and the extensions are sewn onto the braided section, while the rest of the hair is free-flowing. That’s why this technique offers versatility and allows for various styling options.
The half sew-in is a modified version of the traditional sew-in method. It is called a “half” sew-in because it focuses on a section of the head, usually the back or sides, while braiding or styling the front section. The purpose of a half sew-in is various, including:
- Natural appearance: The half sew-in technique allows the natural hair to blend with the extensions for a realistic and natural-looking hairstyle. Meanwhile, the braided front section enhances the overall look with texture and depth.
- Versatility: Since only a portion of the hair is braided and the rest is left free, the half sew-in offers versatility in styling. You can experiment with different hairstyles, such as updos, ponytails, or buns, with the unbraided hair while still enjoying the benefits of added length and volume.
- Protection: The braided front section of the half sew-in shields the hair from external factors, such as heat and manipulation to promote healthier hair growth and minimize breakage.
- Low maintenance: Compared to a full sew-in, the half sew-in requires less maintenance. The unbraided hair can be easily washed and styled without the need to adjust the sewn-in extensions.
- Customization: With a half sew-in, you can choose different braiding patterns and decide where to place the sew-in extensions, allowing for a personalized and unique look.
How Braids in the Front Enhance the Style
Added texture and dimension
The inclusion of braids in the front section of a half sew-in hairstyle can elevate the look by adding texture and dimension. Braids have a unique ability to create intricate patterns and designs for the visual appeal of the hairstyle. They can be styled in various ways, such as cornrows, French braids, or even box braids.
The braided front section adds visual interest and provides a contrasting element to the loose or sewn-in hair at the same time. The combination of braids and flowing hair creates a captivating interplay of textures for a dynamic and eye-catching hairstyle.

Types of braids for the front section
- Cornrows
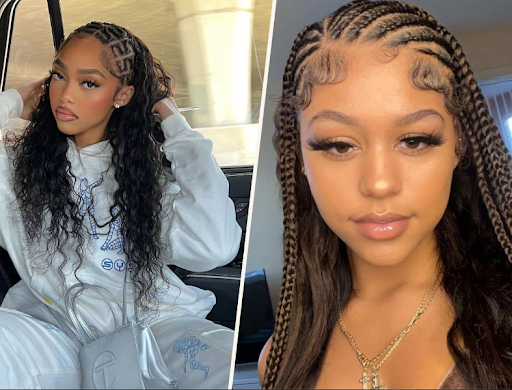
Cornrows are a classic and versatile braiding style that braids the hair closely to the scalp in straight or curved rows. They can be done in various thicknesses and patterns for endless creativity. Cornrows in the front section can frame the face beautifully and to provide a sleek look.
- French braids
French braids, also known as Dutch braids, are characterized by three strands braided together. In particular, it incorporates new sections of hair as you move down the braid. French braids in the front section create an elegant and sophisticated appearance. Moreover, they can be done as single braids or multiple braids, adding a touch of femininity and grace.
- Box braids
Box braids are achieved by dividing the hair into small, square-shaped sections and braiding each section from the root to the ends. Box braids in the front section give the hairstyle a trendy and youthful vibe. In addition, they offer versatility for length, thickness, and styling options, making them a popular choice for a bold look.
- Halo braids
Halo braids involve creating a crown-like braid that wraps around the head, starting from the front section. This style can be achieved by using a single braid or multiple braids. Halo braids add an ethereal touch to the half sew-in hairstyle, creating a stunning focal point.
Preparing for the half sew in with braids in front style
Preparing for the half sew in with braids in front style involves several important steps.
- Choosing the right hair extensions for a natural blend
Before starting, it is crucial to pick extensions that closely match your natural hair’s texture and color. Opt for high-quality human hair extensions, like those available from Jen Hair, for the most realistic look.
- Selecting appropriate length and texture
You should also consider the desired length and texture of your final hairstyle. Choose extensions that match your desired length or slightly longer to allow for trimming. Meanwhile, ensure the texture of the extensions closely matches your natural hair for a seamless blend.
- Preparing the extensions
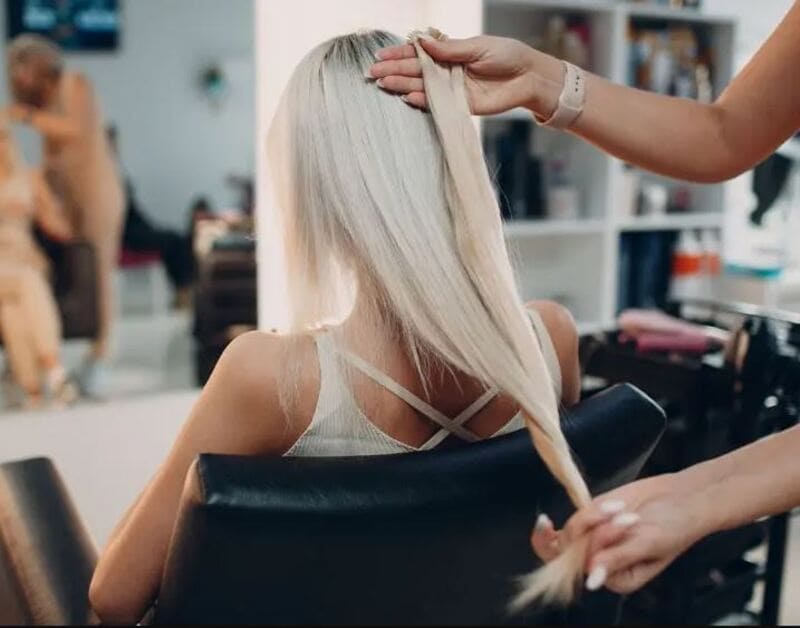
To prepare the extensions, wash and condition them to remove any buildup. Then, gently comb through to detangle before letting them air dry or using a low heat setting with a blow dryer. After that, you can style the extensions according to your preference, straight, curly, or wavy.
- Materials and tools:
Gather the following items for the process of half sew in with braids in front:
– Suitable hair extensions
– Rat-tail comb or wide-tooth comb for removing knots and tangles
– Hair clips or ponytail holders for sectioning
– Hair ties or rubber bands
– Sewing needle and thread matching your hair or extensions
– Scissors for trimming extensions if needed
– Bobby pins or hairpins
– Styling products like leave-in conditioners, heat protectors, and curl-enhancing products
– Optional heat styling tools like curling irons or straighteners
– For better visibility during the process, prepare a mirror and good lighting
How to Achieve Half Sew In With Braids In Front
Braiding the Front Section
Creating individual braids
Here are simplified step-by-step instructions for creating cornrows or individual braids:
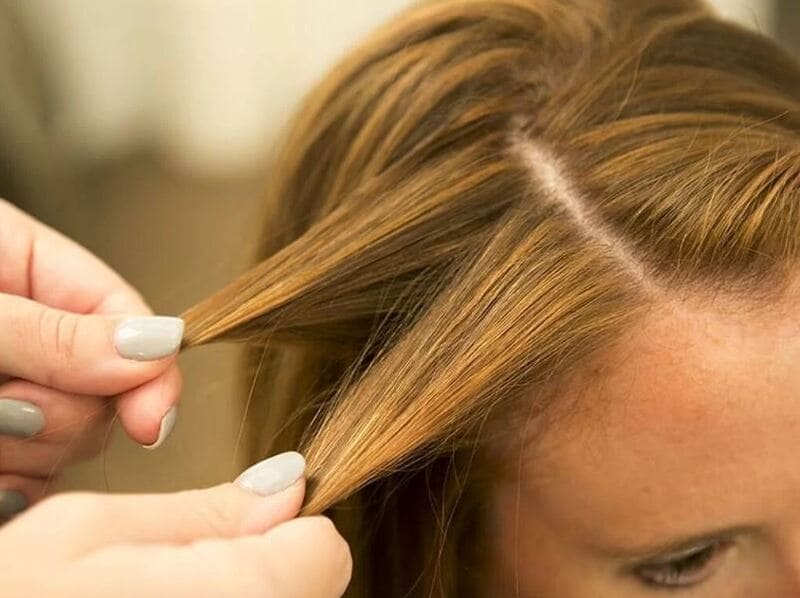
- Step 1: Start by separating the front section of your hair from the rest.
- Step 2: Take a small section of hair from the front and divide it into three equal parts.
- Step 3: Cross the right section over the middle section, then cross the left section over the new middle section to start the braid.
- Step 4: As you continue braiding, add small sections of hair from the parted section to each side.
- Step 5: Keep braiding until you reach the desired length or the end of the section.
- Step 6: Secure the braid with the hair tie and repeat the process for the remaining sections to create cornrows or individual braids based on your preference.
How to achieve neat and secure braids
To achieve tidy and secure braids in the front section of your hair, follow these helpful tips:
- Before you start braiding, make sure your hair is detangled and smooth.
- Divide your hair into clean and even sections for a consistent appearance.
- Use a rat-tail comb or your fingers to separate small and manageable subsections of hair.
- Maintain consistent tension while braiding to ensure neatness and avoid braids that are too tight or loose.
- If you are creating cornrows, keep the braids close to your scalp for a sleek and secure result.
- Consider applying a small amount of edge control gel or styling product along your hairline to manage any flyaways and achieve a polished look.
- For extra security, use hair ties or rubber bands to secure the ends of each braid.
Installing the Extensions
Installing the extensions
Here are simple step-by-step instructions for installing the extensions:
- Step 1: Create a horizontal parting at the back of your head, just above the neck. Separate the remaining hair by clipping it above this section.
- Step 2: Take the first extension weft and check if it fits the parting width. Trim it if needed.
- Step 3: Apply a thin layer of hair glue or use double-sided tape along the top edge of the weft.
- Step 4: Place the weft on the parting, aligning it with your natural hair roots. Apply firm pressure to securely hold it in position.
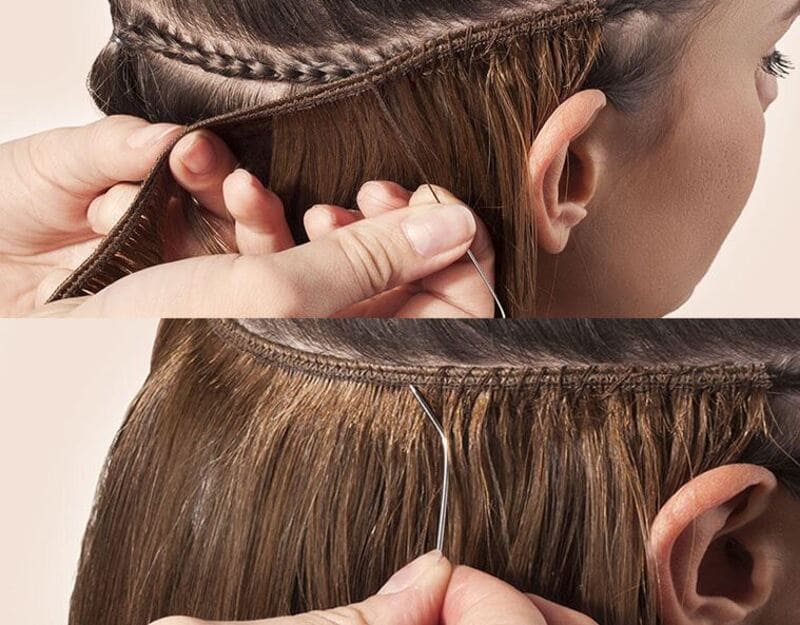
- Step 5: Employ a curved needle and thread to stitch the weft onto the braids in the front area. Insert the needle through the weft and a braid, then pull the thread through. Repeat the process to establish firm stitches along the weft for stability and security.
- Step 6: Repeat the process of attaching wefts, moving upwards along the parting, until you achieve the desired height or coverage.
- Step 7: Finally, release the clipped-up hair above the parting and blend it with the sew-in extensions.

How to achieve a secure and comfortable sew-in
Here are some tips to help you achieve a secure and comfortable sew-in with extensions:
- Firmly and securely braid the front section to create a stable foundation for the sew-in.
- Sew the wefts close to your scalp to achieve a natural and flat appearance.
- Choose a thread color that matches your natural hair or the extensions for a seamless blend.
- Avoid sewing the wefts too tightly to prevent discomfort and tension on your scalp.
- Evenly distribute the weight of the extensions across your head to avoid excessive pulling on specific areas.
- Trim or fold the wefts as necessary to avoid bulky or visible edges.
- Test the sew-in for comfort and make any adjustments to alleviate tightness before styling.
- Use a wide-tooth comb or your fingers to gently blend your natural hair with the sew-in extensions, ensuring a smooth and seamless transition without visible lines or gaps.
- Gently apply a small quantity of leave-in conditioner or hair serum to both your natural hair and the extensions. This will help smooth the strands and add shine, enhancing the overall blend.
- Consider using a texture or curling cream to enhance the curl pattern and achieve a cohesive look between your natural hair and the curly extensions.
- Avoid excessive heat or heavy styling products on your natural hair and extensions, as this can cause damage and compromise the blend. Opt for lightweight styling options and use heat protectants when necessary.
- Discuss the protective nature of braids in preventing hair breakage.
FAQs
Can I achieve half sew in with braids in front if I have short hair?
Yes, it is possible to achieve a half sew-in with braids in front even if you have short hair. However, the length of your natural hair may affect the final result. It is recommended to consult with a professional hairstylist to assess your hair length and determine the best approach.
How long can I keep this half sew in with braids in front on my head?
On average, the half sew-in can last anywhere from 4 to 8 weeks. The duration you can keep the half sew-in with braids in front depends on various factors, such as your hair’s growth rate, the maintenance routine, and the quality of the installation.
How to effectively maintain the curls in the sew-in?
To maintain the curls, you can apply a curl-defining cream or mousse and gently scrunch the hair. It is vital to avoid excessive brushing or combing, as this can cause frizz. Furthermore, protect your curls while sleeping by using a satin or silk pillowcase.
Is it possible to style the sew-in with heat tools?
Yes, you can style the sew-in using heat tools such as curling irons, flat irons, or hot rollers. However, it is necessary to use heat protectant products before applying heat to minimize damage. In addition, set the heat tools to a moderate temperature to prevent potential heat damage to both the sew-in extensions and your natural hair.
Should I swim or exercise with the sew-in?
While it is possible to swim or exercise with a sew-in, take precautions to protect the style and extensions. Before swimming, apply a waterproof sealant or protective product to the hair and extensions. Also, consider wearing a swim cap to minimize exposure to chlorine or saltwater. After swimming or exercising, rinse the hair thoroughly and remember to apply moisturizing products to restore hydration.
Can the sew-in extensions be reused?
In certain instances, sew-in extensions can be reused, but it depends on the quality of the extensions and how well they were taken care of. It is advisable to choose extensions made from 100% human hair. These types of extensions are known for their durability and can be reused with proper maintenance.
In Summary
The half sew in with braids in front hairstyle is a captivating and stylish choice that combines the charm of curly hair with the added allure of braids. It offers a visually striking appearance, featuring voluminous curls and unique braided details that will make you stand out on any occasion.
Now that you have the knowledge and instructions to achieve this stunning hairstyle, we encourage you to let your creativity flow and make it your own. Feel free to customize the size, shape, and placement of the braids to match your personal style and preferences.
If you are looking to enhance your natural hair or add length and volume to this hairstyle, consider exploring the range of 100% natural curly hair options available at Jen Hair. Our high-quality hair extensions seamlessly blend with your natural hair for a flawless and realistic look. Contact us today!
Recommendations:

 Guide Cornrows With Side Part The Best For Beginner
 Ultimate Guide: Headband with Hair Attached (Best Styles for 2025)
 Top 7 Premium Human Hair Clip In Extensions For Black Hair
