No products in the cart.
Hair Care Guide
How to thin out a wig: A step-by-step guide
Are you tired of your wig looking too thick and unnatural? Do you want to achieve a more natural and effortless hairstyle? Thinning out your wig may be the solution you have been looking for. But how do you thin out a wig without ruining it?
In this article, Jen Hair will help you to learn how to thin out a wig. We also guide you through the steps and provide some helpful tips along the way. So grab your wig and let’s get started!
Should you thin out your wig?
Thinning a wig has the potential to yield favorable outcomes, including creating an appearance that is more authentic and comfortable. Additionally, this process can enhance the wig’s ventilation and reduce its weight and bulk.

However, there are also some disadvantages to take into account. Over-thinning the wig produces bald patches or an uneven look that can be intricate to repair. Furthermore, this procedure also has a negative impact on the wig’s durability and lifespan.
Hence, it’s vital to evaluate the benefits and drawbacks meticulously before deciding to thin out your wig. If you decide to learn how to thin out a wig, our suggestion is to exercise caution and allocate sufficient time to achieve the intended results without causing damage to the wig.
How to thin out a wig?
Before you start thinning out your wig, you will need to gather the following tools:
- Wig stand
- Scissors
- Thinning shears
- Comb
- Spray Bottle
Make sure that your tools are clean and sharp, as dull scissors or shears can damage the wig fibers.
After gathering these needed materials, let’s continue with a detailed instruction on how to thin out a wig!
Step 1: Prepare Your Wig
To start, you’ll need to set up your wig on a wig stand or mannequin head. This will allow you to work on the wig without it moving around or slipping. Additionally, it will give you a better view of the wig from all angles, making it easier to see which areas need thinning.
Step 2: Identify the Areas That Need Thinning
Before you begin thinning your wig, you need to identify the areas that need thinning. These areas are usually the top and crown of the wig, as they tend to be the thickest. However, consider if you need to thin out the sides or back of the wig if they are too bulky.
Step 3: Comb the Hair
The next step in the guide “How to thin out a wig” is to remove its tangles or knots. Use a wide-toothed comb and start at the bottom of the wig, working your way up to the top. This will ensure that the hair is evenly distributed and make it easier to thin out the hair.
Step 4: Start Thinning the Hair

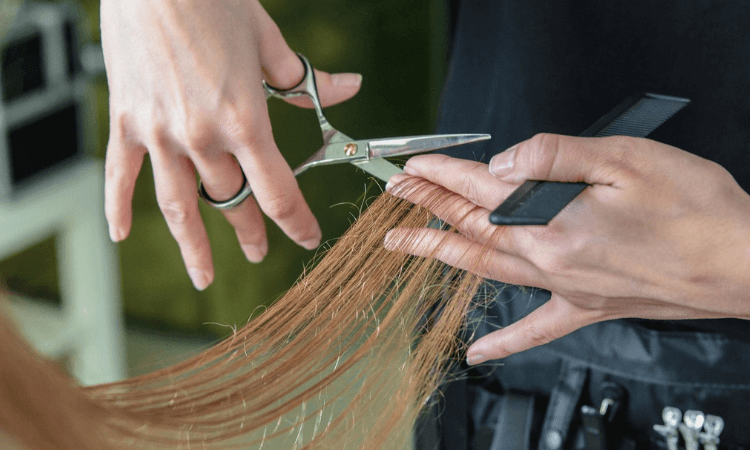
Now it’s time to start thinning the hair. Start by cutting a small section of hair with your thinning shears, which are scissors specifically designed for thinning hair. Hold the scissors at an angle and cut the hair diagonally, rather than straight across, as this will create a more natural look.
Step 5: Blend the Hair
After you’ve thinned out a section of hair, use your comb to blend it in with the rest of the hair. This will ensure that the hair looks natural and seamless. If you notice any uneven areas or bumps, use your thinning shears to smooth them out.
Step 6: Repeat the Process
Continue thinning out the hair in small sections, blending as you go, until you have achieved the desired amount of thinning. Take your time and work in small sections, so you don’t accidentally remove too much hair.
Step 7: Check the Wig
The final step is to try on the wig to see how it looks. Check it from all angles to ensure the hair looks natural and even. If you notice any areas that still look too thick, you can go back and thin them out further.
Now that you have learned how to thin out a wig, we hope you feel confident in your ability to customize and style your own wig. With these tips and techniques, you’ll be able to achieve a natural-looking hairstyle that suits your preferences and needs.
FAQs
1. Why does my wig look so bulky?
There are a few reasons why your wig may appear bulky. One possible cause is that the wig cap is too large for your head size, which can result in excess material bunching up. Additionally, an abundance of hair or hair that is too thick can contribute to a bulky look.
Another factor to consider is the wig’s styling, as some styles may naturally create more volume or bulk. To address this issue, you might consider adjusting the wig cap or searching for “How to thin out the wig?” to achieve a smoother, more natural look.
2. Can you thin a synthetic wig?

Yes, you can thin out a synthetic wig using the same technique as with a human hair wig. However, be cautious when using heat styling tools on a synthetic wig, as they can melt or become damaged.
3. Are there any useful tips when thinning out a wig?
When searching on how to thin out a wig effectively, you should also take note some valuable tips as following:
- Take it slow: Begin by thinning a small amount of hair and then gradually remove more as needed. This way, you can achieve the desired level of thinning without accidentally going too far.
- Work in sections: Divide the wig into sections before you start thinning it out to track the amount of hair you’re removing.
- Thin from the top: Start from the top and work your way down so you can thin the wig too much in any one area.
- Test it out: Before you thin out the entire wig, test a small section to see how it looks.
Final thoughts
In conclusion, if you want to minimize volume, enhance the realistic appearance of your hairline, or tailor your style, thinning your wig can make a significant impact. This article offers a comprehensive guide that outlines the step-by-step process on how to thin out a wig at home. With a little patience and meticulousness, you can obtain your desired look. Finally, don’t forget to keep following us for the best hair guide in the near future!

 Guide Cornrows With Side Part The Best For Beginner
 Ultimate Guide: Headband with Hair Attached (Best Styles for 2025)
 Top 7 Premium Human Hair Clip In Extensions For Black Hair
