No products in the cart.
Hair Care Guide
How to install a 360 frontal? A complete guide for beginners
If you are looking to enhance your appearance with a natural-looking and versatile hairstyle, a 360 frontal wig might be the perfect option for you. 360 frontals have gained immense popularity in recent years due to their ability to provide a seamless hairline and complete coverage around the head.
In this comprehensive guide, Jen Hair will walk you through the step-by-step process of how to install a 360 frontal. We also answer some frequently asked questions to ensure you have all the necessary information to rock this stunning hairstyle confidently.
Let’s dive in!
Material & supplies needed for installation
Before we dive into the process on how to install a 360 frontal, let’s first gather all the materials and supplies required for a successful 360 frontal installation:
- 360 frontal wig: Make sure you have a high-quality 360 frontal wig that matches your desired hair texture and color.
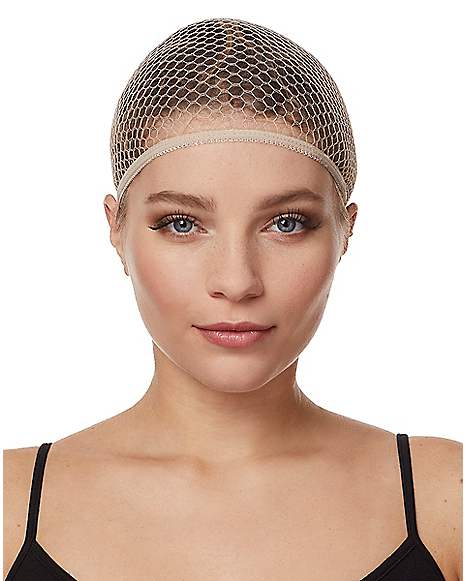
- Wig cap: A wig cap will help secure your natural hair and create a smooth base for the wig.
- Scissors: You might need scissors to trim any excess lace around the frontal.
- Adhesive: Choose a suitable adhesive or wig glue to secure the frontal in place.
- Adhesive remover: It is essential to have an adhesive remover to safely take off the wig when needed.
- Wig clips or elastic band: Wig clips or an elastic band will add extra security and keep the wig in place throughout the day.
- Comb or brush: Have a wide-tooth comb or brush to detangle the wig and your natural hair.
- Alcohol or witch hazel: These will help cleanse the skin and remove any residues before applying the adhesive.
How to install a 360 frontal?
Now that you have all the necessary materials ready, let’s follow our step-by-step instructions on how to install your 360 frontal below!
Step 1: Prepare your natural hair
Start by preparing your natural hair to ensure the wig sits flawlessly. First, braid your hair close to the scalp or put it in cornrows. This step will create a flat surface for the wig to lay on, preventing any bumps or lumps.
Step 2: Wear a wig cap

The next step is to put on a wig cap that closely matches your skin tone. This will not only hold your natural hair in place but also help protect your scalp from potential irritation caused by the adhesive.
Step 3: Position the 360 frontal
Place the 360 frontal on your head, aligning it with your natural hairline. Adjust the wig until you are satisfied with the positioning. Ensure that the frontal’s edges align with your ears and the back matches your nape.
Step 4: Customize the frontal
Some 360 frontals come with excess lace that needs to be trimmed. Carefully cut the lace along the frontal hairline, leaving a small amount to secure the wig without damaging the hair.
Step 5: Apply adhesive

This step is a key part on how to install a 360 frontal. We recommend using a small brush, then applying a thin layer of adhesive or wig glue along your hairline. Be cautious not to apply too much, as it may cause a messy and uncomfortable installation. Let the adhesive dry until it becomes tacky.
Step 6: Secure the frontal
You should gently press the frontal onto the adhesive, starting from the center and working your way outwards. After that, you can use a comb to press down the edges for a seamless blend.
Step 7: Install the wig clips or elastic band
If your frontal wig doesn’t come with an elastic band, you can sew one onto the wig cap. Alternatively, use wig clips to secure the wig in place. This step will add extra stability, ensuring your wig stays put even during vigorous activities.
Step 8: Style as desired
Now that your 360 frontal wig is securely installed, feel free to style it as you wish. You can part it in the middle, on the side, or even style it into a ponytail for a variety of looks.
FAQs
1. How long do 360 frontals last?
The lifespan of a 360 frontal is influenced by various factors, such as the quality of the hair used, maintenance routine, and frequency of use. Typically, a well-maintained 360 frontal can last for about 6 to 12 months.
However, keep in mind that 360 frontals are not a permanent solution and will eventually need to be replaced. The durability of a 360 frontal can also be affected by how often it’s worn and the level of activity during use.
2. Can you sleep with a 360 frontal wig?

While it is possible to sleep with a 360 frontal wig, it is not recommended. Sleeping with the wig on can lead to tangling, matting, and potential damage to both the wig and your natural hair. It’s best to remove the wig before bedtime and store it properly.
If you still decide to do so, remember to use a satin or silk scarf to wrap your hair gently. Just with this simple step, you can help reduce friction and preserve the wig’s integrity.
3. What do I need to make a 360 frontal wig?
To create a 360 frontal wig, you will need the following:
- 360 frontal: The essential base for your wig.
- Wefts or bundles: Hair wefts or bundles to sew onto the wig cap.
- Wig cap: The foundation for your wig.
- Needle and thread: Used to sew the wefts onto the wig cap.
- Wig stand or mannequin head: To hold the wig in place while you work on it.
- Scissors: To trim the wig to your desired style.
Final thoughts
Above is the complete guide on how to install a 360 frontal. Please take note of all of the materials needed and the steps and you can do it yourself confidently. You should also remember to take proper care of your wig to ensure its longevity and maintain its natural appearance.
Finally, please leave a comment in the section below to share your progress and share this article as well!

 Top 5 Flawless Sewin With Braids In Front Ideas For Update Your Look
 Top 10+ beautiful crochet hairstyles the most popular trends
 10+ Sleek Hair Ideas for a Polished And Chic Look
